
Although I have worked with Angularjs for a while, I never got to explore Ionic until very recently.
In this post, I write about my first experience with setting up Ionic and building a simple application with it.
I found a client who wanted to hire me to work on an android project that was built using Angularjs/Ionic and cordova. .
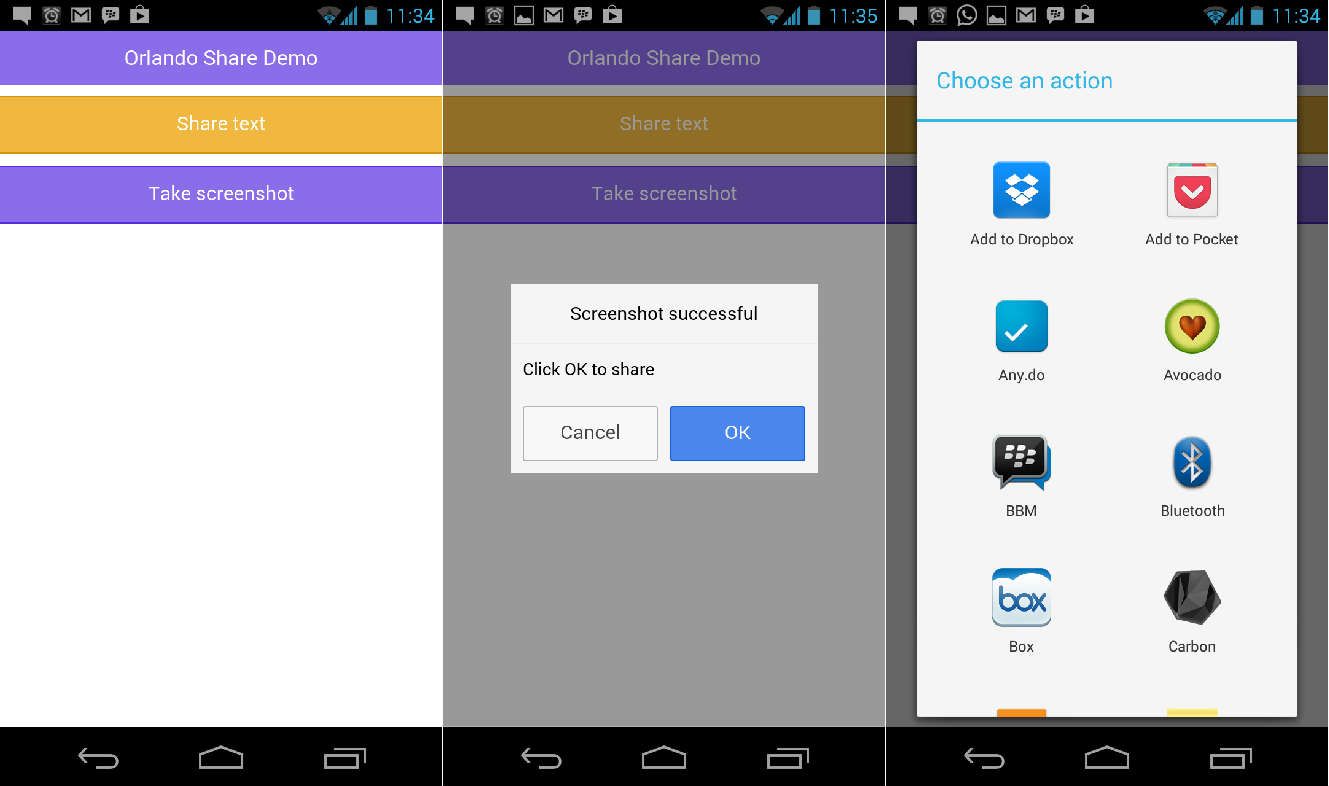
I was asked to create a very basic android application using Ionic/Angularjs. The features are:
- share text from my app to another app.
- take a screenshot of my screen, save it and share it.
Step1 : Installation
You need to have node.js installed.
-
Install cordova
$ npm install -g cordova -
Install ionic, set platform, and run. You can replace android with ios here
After instlalling cordova. if you use a windows machine, you'll have to set up Java JDK, Apache Ant and Android SDK. Download these and refer to the phonegap guide for help with PATH setup.
I installed this plugin to use android's sharing feature.
Installing via CLI is easy. Just run
$ cordova plugin add https://github.com/EddyVerbruggen/SocialSharing-PhoneGap-Plugin.git
Step2: Setting Up Angular
For my Angular setup first. I created a module, a controller(in a sperate module), and defined functions to handle my screenshots which will be applied to my views.
- Controller
- Main module. Here i included
ionicandMainCtrlas dependencies.
- Main View
My main view is really simple with a header-bar and two buttons that calltoShare()andtakeScreenshot()when clicked.
To run the aapp. Connect your android phone, and run ionic run android

Testing
Head on to github and download the code to tweak or test it.